Catalog › Installation Guide: Ford F150 Dual 3″ Installation Guide: Ford F150 Dual 3″
Warnings and Safety Measures
• Allow the vehicle’s exhaust system to cool before removal. Exhaust system temperatures may cause severe burns.
• If working without a lift, always consult vehicle manual for correct lifting specifications.
• Always wear safety glasses and ensure safe work area.
• Catalytic converter are to be used for off road use only.
• Professional installation is recommended.
• Extreme caution must be taken to ensure proper alignment of the exhaust tips. Do not tighten any of the four (2 GM & 2 Solo) band clamps until everything is in place and the tips are aligned perfectly.
Removing the Stock Exhaust System
1. Remove two 13mm bolts at the two hole flange that connects the converter assembly to the mid pipe.
2. Loosen 15mm nut on the band clamp at the flex pipe.
3. There are two hangers on between the converter and the muffler. Remove the forward most hanger from the truck body using a 10mm socket. This allows the system to drop.
4. There is a ‘keyway’ connection where the mid-pipe meets the muffler assembly. Drop the exhaust from the flange at the converter and turn the mid-pipe counter clockwise and once the keyway has moved to the “release” position, pull the exhaust pipe out. Heat or lubricant might be necessary to twist the pipe.
5. Slide muffler and tailpipe assembly rearward to remove from hangers.
Note: Squirting soapy water into the rubber hanger (Soapy water does not hurt the rubber like WD40 could) will make removal easier. A large set of channel lock pliers to squeeze the hanger out of the rubber may help.
6. Use care not to damage brake and ABS lines by the rear axle area.
7. If you are not using a hoist you may have to cut the tailpipe by the rear of the muffler to maneuver the pieces out.
8. Reinstall the mid pipe hanger using your 10mm socket.
9. Removal is now complete.
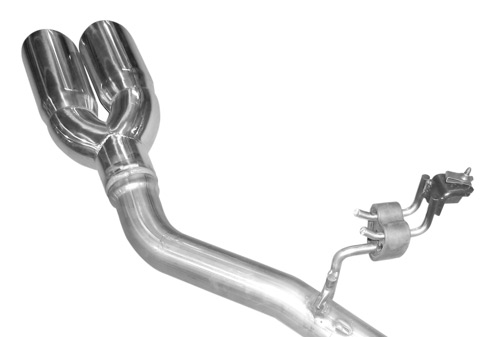
Installing Your New SOLO Mach-X Eco-Dual Exhaust Kit
Note: If you snug everything first instead of fully tightening, it will allow for movement and adjustments once the new system is on. Snug, align, snug some more and then do your final tighten.
1. Relocate rear driver’s side differential vent tube to the outside of the brake hoses. Pull the differential vent tube off from the top and wind it around to the left or outside of the brake hoses. Relocating the diff vent tube will give the tailpipe its proper clearance.
2. Remove bolt from frame clip. Insert frame clip for left side (driver’s side) tailpipe. Solo supplies you with the frame clip and hanger assembly. The frame clip will be apparent where to put it (square hole) if you hold the tailpipe in place. Snug the bolt from the hanger assembly to the frame making sure the two hooks face rearward.
3. Slide Solo’s mid pipe into the two hangers and tighten flanges with the 3” bolts and nuts that are supplied.
4. Slide on muffler assembly.
5. Slide on both tailpipes making sure they fit nicely into the hanger brackets.
6. Install band clamps (bolts facing upwards.) Manipulate all parts into proper position with proper clearances. Lightly snug the band clamps so that you still have room to maneuver.
Solo Clamps: Hold the top nut with a 9/16” wrench and lightly snug the bottom bolt head with a 9/16 socket. This flat band clamp will form around each layer of pipe. Tighten the bolts evenly.
7.Check the parts position concentrating on “tip position” and clearances and do a light tighten on all the clamps. Check again and do a harder tighten. Check again and do a final tighten.
8. Make sure the mid pipe hanger that was taken off is tight.
9. Check for rattles. Check that each bolt is tight.
10. Drive away and… Enjoy Going Solo!
Back to TopFor any questions or concerns, please do not hesitate to call:
Jeff at (905)703-1557
Mufflerman (Buffalo NY) at (716) 873-0440
Zoro Muffler Mississauga Shop at (905) 897-6833